-
Showing posts with label Guest Blogger. Show all posts

Sunday, August 11, 2013

Tablets for Tots with Norman Fong


Tablets for Tots: How to Choose
Only a few years ago, buying a portable computer for a young child would seem preposterous, but with the rise of tablet computing and the intuitive touch-screen interface, your son or daughter can be computer savvy before they even learn to read.
You may remember the pre-mouse days of MS-DOS when knowing how to use a computer was more complicated than programming the clock on your VCR, but today's children are growing up in a world where computing is as much a part of life as using the telephone, and just as easy. And with the entry level of tablet computing becoming very affordable in the past couple years, there's no reason not to get your child started with his or her own tablet.
Apple may have unleashed the tablet on the world when it introduced the iPad in 2010, but since then, the options have increased exponentially, and narrowing your search down can be daunting. There are far too many tablets to list here, much less review, so here are a few questions to ask yourself and things to keep in mind when shopping for a tablet for your child:
  • How long do you expect your child to use the tablet? When buying any kind of computer equipment, you run the risk of buying into technology that will be replaced by something better within the next year or so. When you add to that the fact that you're buying something that can easily be dropped, thrown, or simply lost, you also need to think about how well you think your child will treat it.
  • How long will it be age-appropriate? Some children's tablets are specifically designed for certain age groups, so a tablet that's designed for a five-year-old who's just learning to read may be less interesting to him a year later.
  • Is it worth it to buy a more expensive tablet? High-end tablets may not be designed to be kid-safe, but with the right case, can be made to be pretty accident resistant. It's possible that for a bit more money, you could buy a tablet that the kids can use during the day and the parents can use after the little ones are in bed.
  • Do you need a camera? Most – but not all – tablets have cameras now, but not all cameras are equal. If you want your child to be able to take high-quality photographs or videos, pay close attention to the reviews and make that one of your points of comparison.
  • Will you need to buy a case? Most kid-specific tablets have built-in shock resistance and sometimes even waterproofing, but if you're looking into a more versatile tablet for the long-term, you may need to invest in some protection. A quality shock-resistant tough skin or case can add to the price, so be sure to include that in your calculations.
  • Read the expert and customer reviews. The best bet for real world experience with the products you're shopping for (unless you actually know someone who's used it) is to find a retail site that allows customers to review their purchases. Ideally there should be at least a dozen or so reviews to ensure a good sampling, and pay special attention to the bad reviews – but always take the good and the bad with a grain of salt, especially if they're excessively critical or glowing.
Again, there are too many tablets to list in this space, but here are a few you might consider:
For the kids and the adults:
Start by reading reviews and researching the types of apps that you want to use and which platform is best for them.
  • Apple iPad and iPad Mini – Many people still think the original is the best, and with the most apps and accessories available, it's hard to argue.
  • Android tablets – Android is a platform developed by Google and used by some of the top manufacturers. Some of the top picks include the Google Nexus, Samsung Galaxy, and Sony Xperia.
  • Kindle and Nook – The e-readers from Amazon and Barnes & Noble have evolved into full-featured tablets, and may suit your needs well, especially if you have a child who loves to read.
Just for kids:
  • LeapPad Ultra – LeapPad's latest tablet features front and rear-facing cameras, 8GB of internal storage and an integrated MP3 player. It also includes a child-safe browser.
  • VTech InnoTab 3s – VTech's newest offering has a pivoting camera that can face front or rear, a kid-safe browser, the ability to communicate with other InnoTab tablets, as well as to send messages to you on your Android phone or iPhone.
  • Fuhu NABI tablet – Fuhu's tablet bills this product as the first full-featured Android tablet for kids. The software allows varying levels of kid-safe protection, limiting younger children to safe apps and browsing while allowing it to be unlocked for a full internet experience for older children and parents.
  • Ematic FunTab – The FunTab also runs on Android and features software that allows you to remotely read to your child via a webcam and the internet – a nice feature for parents who work on the road.
In the end, every child and every family is different and there is no single product that's perfect for all of them. The best you can do is to determine how your child will use the tablet and try to find one that will not only be engaging to them today, but also useful down the road.
Norman Fong is CEO and Co-Founder of BuyVia, an online and iOS App smart shopping service that finds high quality products at the best price available. Deals on popular products like tablet computers, including the iPad and Android tablets, can be sent automatically to users.

Thank you to Norman Fong for guest posting here today!
Continue Reading ...

Sunday, July 28, 2013

Guest Post with Jennifer Lutz

Resurrect Old House Items with Plants
I always find something worth using when I clean out my attic or garage. Repurposing these old and worn house items as planters often results in unique pieces that add an easy charm to my décor.
Plants can grow just about anywhere. These easy planter ideas will resurrect your old house items into something pretty and useful.

Galvanized Containers


If you're only starting out with repurposing, worn and rusted galvanized containers are perfect for your planter project because of their sturdy material and size. Start by drilling holes at the bottom of the container for easy drainage. Afterwards, fill your old galvanized containers with soil and carefully replant your flowers and shrubs. For a brighter look, the containers can be repainted in vibrant colors.

Bicycle Basket


Instead of throwing out your kids' used and broken bicycles, turn them into shabby chic planters. First, revamp your bicycle by refinishing the frame then repainting it. Next, fill the bicycle basket with soil then put your plants in.
If your old bicycle doesn't have a basket, you can easily make one using a wine crate or unused drawer. Place your planter box between the handlebars, then prop up your revamped bicycle planter against a wall in your garden or front yard.

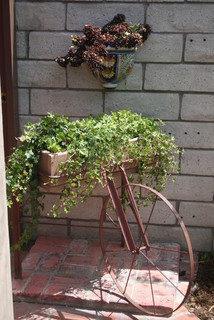
Wheelbarrow


Old wheelbarrows make great mobile planters. However, the material of the wheelbarrow is thicker than that of a galvanized container, so keep in mind that it'll be harder to drill drainage holes on it. You can spruce it up a bit by repainting it, but I like to leave the wheelbarrow a bit rusty to add some character.

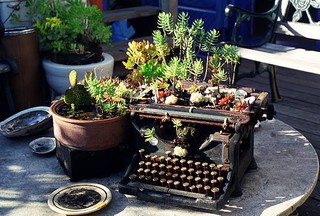
Vintage (but broken) Typewriter


The frame of a vintage typewriter makes the perfect bed for shrubs and flowers, and it looks just right at home on a patio table.
A typewriter has enough built-in drainage that you won't need to drill any holes anymore. However, to make use of that drainage, you have to remove the bottom panel of the typewriter. Then, fill the area under the keys with small pebbles so that the soil won't fall through the built-in spaces. Finally, fill it with soil then transplant your shrub or flowers.

Urns


Urns made from clay or terra cotta can also serve as planters. Easy to maintain and to move, an urn planter adds a traditional touch to your décor. Turning your urn into a planter is easy, since it already has a form perfect for planters. Its material and durability makes it perfect for big shrubs and tall plants.

Mason Jars


These handy-dandy mason jar planters make maintaining an herb garden a breeze. You can place them by the sink, on your kitchen windowsills, or on counter tops. You can also make a shelf for them on a sunny area in your kitchen.

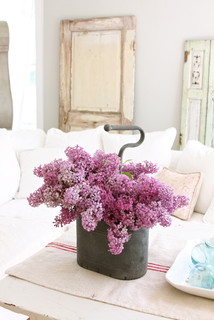
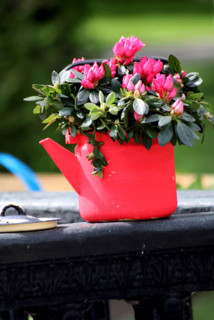
Repainted Kettle


What a pretty sight! Paint the exterior of an old kettle then turn it into a flower pot, giving you another mobile planter that you can place almost anywhere in your home. These kettle planters are also perfect as centerpieces for your patio or dining table -- no need for fussy flower arrangements! Just place a jute cloth or piece of burlap at the center of your table to catch any fallen leaves or spilled soil. Place the kettle planter on top and you're ready to go. When dinner is done, you can easily return the kettle flower pot to your garden or windowsill until the next time you need an impromptu table centerpiece.

Burlap Sacks


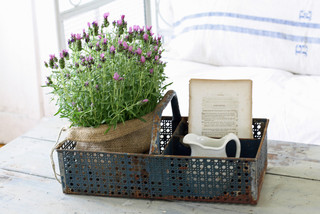
If you're a bit hesitant to use and repaint old rusty containers as planters, you can also just place them in a burlap sack. The extra fabric at the upper part of the planter can be casually folded down, tied with jute twine, or glued onto the inside of the container for a seamless look. Place your burlap-covered planter on a tray (possibly also salvaged from the garage) and put it out on the patio.
You can also line a row of these burlap planters along a wall to create a quaint display.

These creative tips can turn old, withering household items into a renovated planter for your garden. Give these ideas a go and see how these repurposed planters bring life to your home.

Jennifer Lutz explore how first time home decorators can design on a real budget, blogging for www.christmastreemarket.com. You can read more of her thoughts on home décor for the first time designer at http://blog.christmastreemarket.com/category/diy-decor/.
Continue Reading ...

Sunday, July 21, 2013

Painting Party with Angelo DiGangi | Guest Blogger

Painting Party ñ Patio Style!

When it comes to hosting group activities with kids ñ whether you are celebrating your child's birthday with the entire class or barbecuing with the rest of the neighborhood ñ one of the hottest trends is throwing a painting-themed party.

Even if you just want a fun way to spend a Saturday with your own children, setting up a painting station on your patio is a sure-fire way to create fun for the whole family.

And the process from start to finish is relatively simple regardless of the number of participants you plan to invite. With that in mind, here are some basic guidelines to follow for maximizing the fun, highlighting the positive aspects of social camaraderie and keeping clean-up to a minimum.
Prepare for Success

The best parties are those that have been thought through well in advance of the guests' arrival. To ensure smooth sailing from start to finish, perform the following tasks beforehand.

Protective Measures

Even if you have the most spatially-conscious kids on the planet in attendance at your party, where there is an open can of paint, a knocked-over container is sure to follow. So to protect your outdoor patio furniture from those inevitable puddles, cover your tables and chairs with a plastic drop-cloth, a tarp or even on old sheet before you begin doling out the painting supplies.

Even if you have waterproof and weather-resistant outdoor pillows or patio cushions, due to the messy nature of this party, it's best to remove them entirely from the scene as opposed to tossing them off to the side. Place them inside the house, garage or even in outdoor storage bins with lids you may have on the patio for just such a purpose (or for storms, off-season storage, etc.).

Finally, no matter what you end up painting, when you set the item aside to dry, make sure to protect the surface of the table or floor with coverings such as newspapers or old magazine pages.

The Right Stuff

As in everything in life, projects are much easier if you have the right tools. For your painting party, there are only a few things to gather and you're good to go!
You'll need:
  • Brushes: Compile different sizes and widths ñ perhaps one larger and one smaller for each child ñ and place them in containers on the table or lay them out at individual seats.

  • Coveralls: Ask the kids to wear something they don't mind getting messy or have old t-shirts or smocks for them to use during the party.


  • Paints: Depending on what you decide to paint, there are types of paints that are better suited for certain projects. For example, puffy paints work better for decorating clothes (like T-shirts or shorts/jeans) and craft paints are good for items like flower pots.


  • In fact, let's stick with the outdoor patio theme and use hand-painted flower pots as our painting party project! For each child you'll need:
    • One terra cotta pot

  • One shovel (you can also use spoons in lieu of individual shovels)


  • Potting soil


  • Flower Seeds: you can set out several different varieties and give each child a few seeds of their choice or you can purchase individual seed packets and let them choose from them


  • Pint-Sized Picassos

    Now that you have everything you need, get out of the way and let their creativity take over!

    First, have the kids paint whatever designs they like on the flower pots. You might suggest they paint their names, or the names of their parents (if used as gifts), or even the type of flower they will be planting. Pets and sports themes are also great options!

    Once the pots are painted, place them aside to dry. Depending on your outdoor conditions, times will vary but just make sure they are dry to the touch before you move on to the next step.

    Once they are dry, have each child reclaim their pot and begin planting.

    Scoop potting soil into each pot and lightly pack it down to about 1 inch below the rim. Push your seeds into the potting mix to the recommended depth for the type of plant and gently cover them with soil. Water each pot before the guests leave and wish them luck with their newly-discovered green thumbs!

    What other ideas do you have for making sure you hit it out of the park with your next patio painting party?

    Angelo DiGangi, a Home Depot sales associate in the Chicago area, is a regular Home Depot blog contributor on outdoor decor projects and products. Angelo's interests range from providing homeowners tips on flower seeds to discussing the latest trends in outdoor patio furniture.

    Thank you Angelo DiGangi & Home Depot for being our Guest Blogger today!

    Continue Reading ...

    Sunday, March 17, 2013

    GIVEAWAY - Pine Creek Style

    This beautiful necklace is being given away by my mom over at Pine Creek Style.
    Go enter HERE right now and share too!

    Continue Reading ...

    Monday, October 22, 2012

    Just Plain Ole Bread Pudding

    Hi it's NeeCee again from PineCreek Style. I am here to share another family recipes.

    Our family loves the ultimate comfort food; bread pudding. It is always expected to be on the menu for the holiday's. 
    Or, whenever the grand kids put in a special request. 
    (Who could refuse such cute kids with questioning lips and sad puppy-dog eyes? They know thatlook always melts Nonny's heart!) 
    Just Plain Old Bread Pudding

    A cute note....One morning, our 3 year old daughter was eating bread pudding for breakfast.  A neighborhood had stopped in for a morning cup of coffee. 
    Her daughter asked my daughter, "Watch ya eating?". 
    Sissie replied; " Just plain old bread pudding!"
    "AND... that's how we named my bread pudding!"
      "Our daughter...Tara aka Sissie"...
    You will need a large bowl for mixing and a 9 x 13 oblong baking pan.
    Preheat oven to 350 degrees.
    Just Plain Ole Bread Pudding by NeeCee
    8 cups cubed of day old buttermilk bread, leave the crust on
    9 eggs
    2 1/4 cups whole milk
    1 3/4 cups of heavy whipping cream
    1 cup sugar (or sugar substitute/Truvia)
    3/4 cup butter melted
    3 teaspoons pure vanilla
    1 teaspoon ground cinnamon
    * Nuts are optional, may be added on top of each portion. 
    I also use toasted, salted pecans.
    In a large mixing bowl place the cubed bread.
    In a measuring pitcher mix; 
    ALL other ingredients, blending well.
     Mix Well...
    Pour liquid ingredients over the cubed bread and mix well. 
    Cover all of the bread with the liquid. 
    Mixed and in the pan, ready too cook.
    Place in a greased 9 x 13 baking pan, uncovered.
    Bake at 350 degrees for 40-45 minutes. Check the center with a toothpick or knife when done, should come out clean. Let rest for 10 minutes before serving.
    Oh my Goodness-Golly! YUMMY for the TUMMY!
    Yummy Caramel Sauce
    *Grandma Hacker's Recipe

    1 cup sugar
    1/4 cup water
    1 tablespoon of lemon juice
    2 tablespoons of butter
    1 cup heavy whipping cream
    dash of table salt
    Homemade Caramel 
    While the pudding is baking:

    Bring sugar, water and lemon juice to a boil.
    Reduce the burner to medium and cook until sugar is dissolved. the mixture will turn a golden amber color. 
    Stir in butter until it melts. Remove from heat.
    Serve over bread pudding if desired.
    *I usually only make this for Holiday's otherwise, I use ice cream topping!

    Just plain ole good food served with Style...
    NeeCee

    Thanks for sharing this MOM! The girls love this recipe! And thanks for sharing my photo too! ;)
    Continue Reading ...

    Thursday, April 12, 2012

    Pinwheel Cupcakes with Color Issue

    Hello there! My name is Aarean, the face behind Color Issue, and I am so excited to be here on Trendy Treehouse and share with you my fun Pinwheel Cupcake tutorial! You see, I have this slight obsession with color. That is why I began my blog Color Issue, a blog dedicated to all things colorful! :-) 

    So without further adieu, here's the how to...
    **oh and don't forget to come on over and visit Color Issue (you might enjoy my April Giveaway!)
    Photobucket Photobucket Photobucket Photobucket 
    Take the colors you want to create your design...I liked doing circles. The great thing about this is that each cupcake will be different! Like a work of art **wink
    Photobucket Photobucket Photobucket Photobucket
    Thank you for stopping by and sharing this fun tutorial with us Aarean! These cupcakes look so delicious and who wouldn't love the color! WOW!
    I will be stopping by to visit Aarean's Blog Color Issue soon to share how color inspires me! ;) I'll be sure to share with you when and where!
    Continue Reading ...

    Monday, January 16, 2012

    Easy Baked Apples - A Guest Post

    Hello, Trendy Treehouse readers!

    My name is Rebekah, and I'm  from Potholes and Pantyhose I am so honored that Tara asked me to be a guest here today. She's pretty awesome, but I realize you guys know that already.
    On my blog Potholes and Pantyhose, I share and photograph detailed tutorials of my DIY Projects, Recipes, Photography Tips and Remodeling Endeavors.
    And today, I wanted to offer a yummy dessert-Easy Baked Apples-that can be made at the last minute and with ingredients you probably already have on hand.
    These Easy Baked Apples are one of my favorite go-to's when last minute guests arrive. To really go over the top, add a little french vanilla ice cream and be crowned dessert queen of the year.
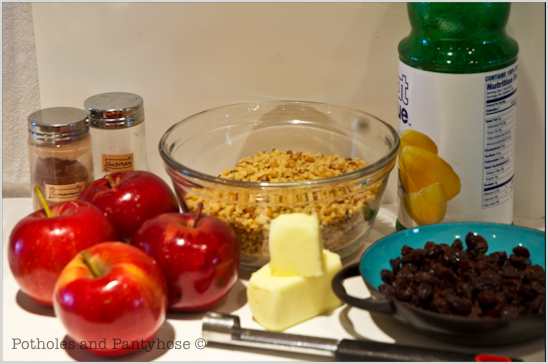
    Here's what you'll need to make these Easy Baked Apples:

    4-6 Jonathan Apples
    6 TBS butter-room temperature
    1/4 C Raisins
    1/4 C finely chopped Walnuts or Pecans
    1/4 tsp Nutmeg
    1/2 tsp Cinnamon
    1 tsp Lemon juice (only needed if you are making these ahead and cooking them later, as I did)
    1 TBS sugar (if desired to make the dessert a little sweeter, but can be left out)
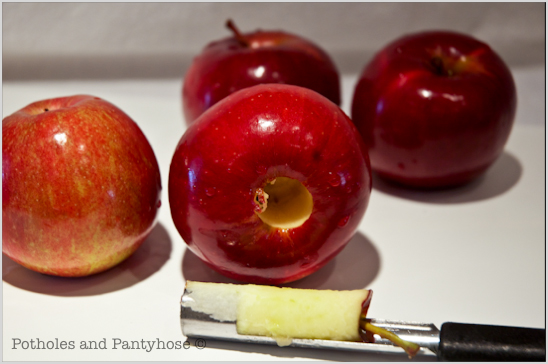
    By using either an apple corer or a paring knife, remove the center of the apple, including all seeds.
    Take a moment to make a face with your cored apples.
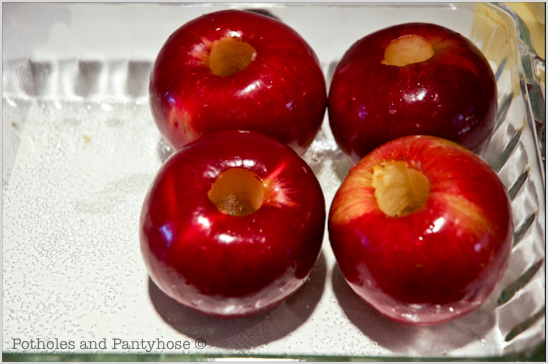
    Place your apples in a sprayed/greased microwavable baking dish.
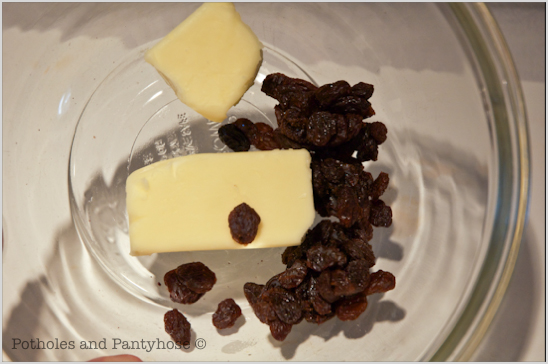
    In a medium sized mixing bowl, add the 6 TBS room temperature butter to the 1/4 C of raisins.
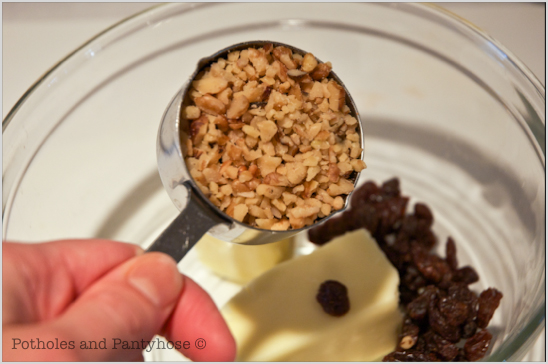
    Add the 1/4 Walnuts or Pecans.
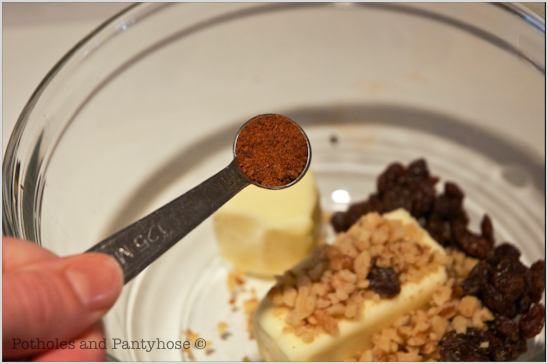
    Next, add the 1/4 tsp of Nutmeg.
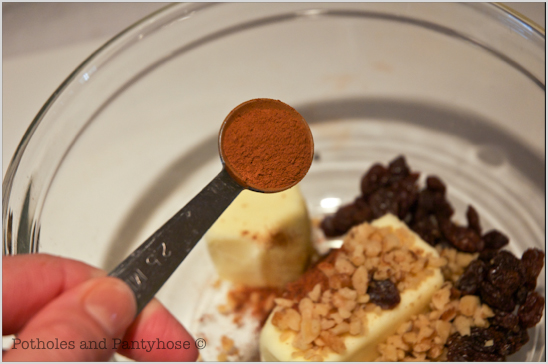
    And then add the 1/2 tsp of Cinnamon.
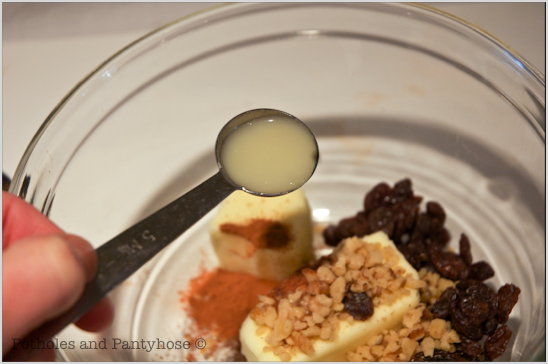
    If you are making this dessert hours ahead of when you might want to actually consume it, add the 1 tsp of lemon juice. The lemon juice allows the apples to maintain their color and crispness, but gives you the option of cooking the apples several hours or even a day later.
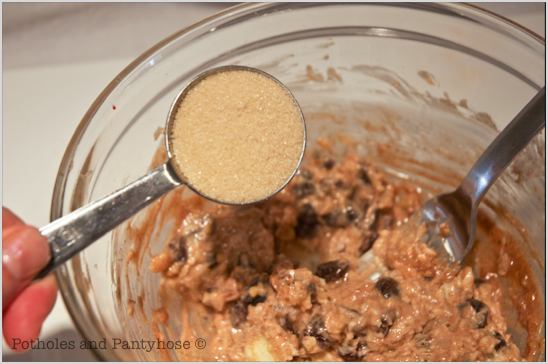
    If you enjoy sweeter desserts, add 1 TBS sugar to the bowl. I opted not to do this, allowing the ice cream to sweeten the deal.
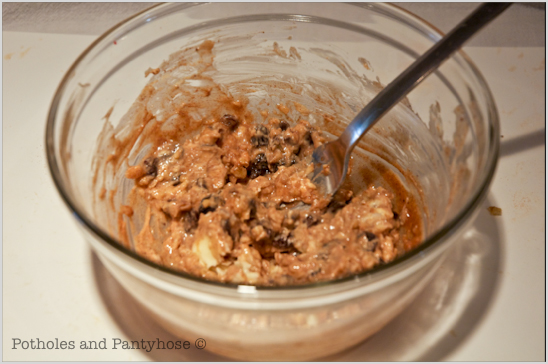
    Mix everything together using a fork.
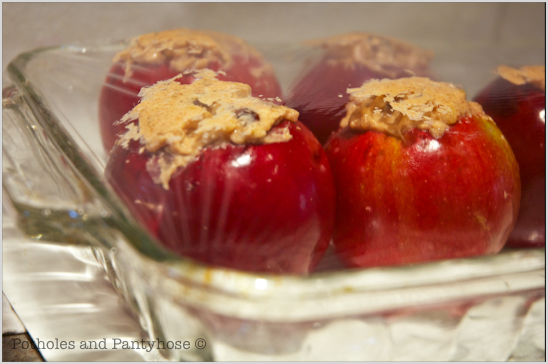
    Using a baby spoon or a knife, fill the apples completely full and a little overflowing with the mixture.
    Tightly saran wrap the top of your baking dish. (If cooking the apples later, place them in the fridge until you are ready.)
    Microwave for about 6 minutes, or until the apple skin is pliable and easily cut with a butter knife.
    Let the apples cool slightly for 1-2 minutes, leaving the saran wrap on the baking dish.

    Transfer to your serving plate and liberally spoon the excess juices over the apples (and over the ice cream, if desired). Serve the apples whole or sliced up for easy eating.

    Enjoy!

    Stop by Potholes and Pantyhose for other recipe, craft, and remodeling ideas. I am so looking forward to meeting you all. And, thanks again, Tara for letting me be a guest here today. It's been a real hoot!

    Love-Rebekah
    Continue Reading ...

    Sunday, June 13, 2010

    ♥ Guest Blogger ♥

    Well this week we have a visit back from a past guest blogger. Actually, Rebekah from Potholes and Pantyhose will be bringing us great posts once a month. YEAH! She has such great talent, we are so glad to have her here. So let's welcome Rebekah back!

    ~ She is posting a fantastic tutorial on how to make your photo POP. Sorry little pun there. There is a bubble in the photo. LOL On to Rebekah's great post~

    I am more than happy to be a guest blogger at Trendy Treehouse! I just love Tara for allowing my weirdness on her site. I’m Rebekah from www.potholesandpantyhose.com and I blog about my life on the road with my musician hubby, my remodeling projects, my photography, and the arts and crap that I enjoy making from cast-offs. I try to maintain a somewhat normal life, however, normalcy keeps escaping me.

    Let me give you a disclaimer on this tutorial-I am not a professional photographer. I just
    enjoy sharing the knowledge that I do have with people that might appreciate a tip here or there.

    Today, I would like to show you how to take and edit an unconventional photo.
    Let’s get started! Making your subject at ease can be tough. I like to put the client in a familiar setting or position to help them relax. My subject was most at ease doing this-blowing a bubble.
    Isn’t he just the cutest?
    I liked the photo, but there were a few things that needed a fixin’. (That’s Okie talk...)
    I didn’t like the chair sticking into the frame. I made a copy of the background and then cropped out the offender.
    His skin looked a little flat, so I used the ‘diffuse glow’ function. It’s very flattering to skin tones-boys and girls alike.
    He looks so darn purty now. But don’t tell him. He is very macho.
    The overall color was too brown for me. I adjusted the levels using ‘color balance’ (found under the tab ‘Image’ and scrolling down to ‘adjustments’).
    His eyes needed to pop a little more, so I lassoed both of those cute little suckers and clicked on the ‘Filter’ tab. Scroll down to ‘Sharpen’ and then choose ‘unsharp mask’ and adjust the amount, the radius and the threshold to your liking.
    I learned this from Pioneer Woman. I like her. And her photo tricks.
    Next, I wanted the bubble gum to stand out a bit more. I lassoed it and then clicked on the ‘Image’ tab and scrolled down to ‘Hue and Saturation’. I brought out the pink in the gum a little more.
    Here is the cute finished product. I just love this little guy. However, he is my nephew after all, and I am a little biased.
    Come on by www.potholesandpanythose.com to see other basic tutorials on photography, arts and crap, remodeling or many other weirdo things that I am into. I would love to hear from you!
    Thanks again Tara for letting me guest blog today!

    -Rebekah
    Continue Reading ...