-
Showing posts with label Girls. Show all posts

Thursday, May 2, 2013

Fancy & Fun Headband

I made this fun headband the other day for my girls.  It was easy to make and didn't take too much time at all.

...What you will need...

Plastic Headband
Ruffled Tulle
Ball Fringe
Flowers

First start by hot gluing on the ruffled tulle.  Don't go down all the way to the end.  That is just going behind the ear and may be uncomfortable to wear.
It should now look like this picture below.
Next, glue on the ball fringe. I tucked under each end to help keep it from fraying.
It's looking cute already. I think it would look cute just like this too. But today we added flowers.
I would usually like to make my own flowers, but these pre-made flowers make this headband quick.  And they are pretty cute too!  Just glue them on and you are done. Probably only took you about 5 minutes to make.
Here is my little model showing it off.  I have to say that we got pretty lucky in finding the dress she is wearing too. I made this headband thinking the colors would go with many of her clothes and then found this dress the next day while shopping. I couldn't pass it up.  She just had to put it on as soon as we got in the car. ;D  Our next stop was the grocery store and the cashier said she loved her outfit and especially the headband. She told her that she should sell them. We just might do that. LOL
Share your version of this headband by emailing me at trendytreehouse@me.com or by linking below in comments. 
Please link back to this post if you use this post. Thanks.
Please Check Out My Other Links Below
I would love to have you like, follow, connect and chat with you more!
tticon-pinteresttticon-facebooktticon-twittertticon-instagramtticon-etsytticon-shop
Continue Reading ...

Monday, January 7, 2013

The Elephant Project

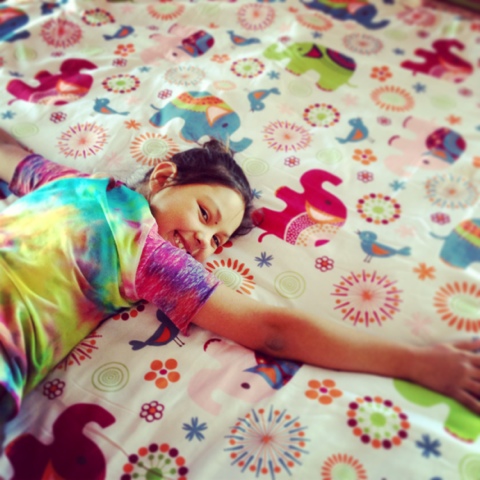
So my little one got her new bedding a couple days ago and she was so excited. She loves elephants and when I saw this set, I knew I had to get it for her. As soon as we opened it up it was on her bed and she was all giggles. She had no idea I had ordered it so it was a complete surprise!
And the elephant project has begun! We made a template of an elephant from one of the new pillow shams and started working!
I have to apologize, I don't have a pic of the template or that process, sorry. But we made the template out of card stock and traced it out on scrapbook paper. Cut a bunch of designs out and set them aside. I wasn't sure what patterns I wanted just yet.

Next, I had an old sign that was damaged and decided to use it as my base.
I painted it pink. It did take a few layers because of the original image, but it didn't take too long.
Next, I wanted to add some sort of background to it and grabbed my stamps. Once the paint was dry, I just used the stamp on the whole board not worrying about overlapping.
I played with different patterns and these three were my favorite. Lastly, I just used Mod Podge to seal the elephants on and to give it a nice finish.
One "Elephant Project" down! She helped me pick a place to hang it in her room.  Right by her closet so she could see it when she lays in bed! LOL
What do you think? Cute, right? We think so! I have a few more elephant projects in mind and will be sharing them on here too! I can't wait to finish her room and share the whole room! Slowly getting there. ;)
Continue Reading ...

Tuesday, March 6, 2012

Braided T-Shirt Headbands

With some left over t-shirt material I made a braided headband for my girls. I used the left over tie dye material. It turned out very cute.
I used my 6 strand braid for this headband. You can find the detailed directions for it HERE.


I started by cutting strips of t-shirt material. 
Then I stretched them out just like I do on the scarves.
To make this 6 strand braid, I used 12 strands. 2 per section I was braiding. I wanted their headbands to be thicker. So start by pinning one end to something. I used my footstool.
Separate the strands into 6 sections. 2 per section as I mentioned above.
Begin on your left. Take the first strand and go over the 2nd, then under the third. Stop. Go to the right side. Take the sixth strand and start by going under the 5th, then over the 4th. Make sense? Basically from the left its over, under. From the right its under, over. Always start on the left. Keep doing this till the end of your strands.
This is what your braid should look like before you sew the ends.
Measure your lil ones head and complete by sewing each of the ends together. I sewed each end first, then both together giving it a stronger hold.
Next take a small strip of fabric to tie and cover the ends. And your done.
Tuck the ends in and flip over hiding the knot and its ready to wear. You can wear it plain with the covered area at the base of the neck or bring it to the top. It's a cute alone like that or slip on a flower clip.
It's super cute on!
Continue Reading ...

Tuesday, February 21, 2012

T-Shirt Headbands

Thought I'd change it up this week! I have been sharing T-Shirt Scarves for the past 4 weeks. Here they are...Scarf 1Scarf 2Scarf 3 and Scarf 4, if you want to check them out!

Well this week I thought I would share a t-shirt headband. As I was making one of my scarves with my mom (@Pine Creek Style), we thought it would be cute to use the same method on a small t-shirt for a kids headband.

I used the same method as the no sew scarf. See Scarf 2 for directions. Just used one of their old shirts. The size of the shirt was a 2T. It will be a little big, so I recommend a smaller shirt because after you stretch it out, well you know, it gets bigger. ;) I would say a 12 mo. shirt would be great.

...Look at how cute it turned out...
She really is happy to be wearing this. LOL I just thought it was a cute pic. Here is one of her smiling and showing that you can wear a clip with this too!
I love it and made a few of them for the girls. They even look cute with pony tails. The one below is another color I made.
And my oldest loved wearing hers too! Perfect for all ages. Mommy's too!
Cute! Cute! Will you make one? Have you made one?
These t-shirt headbands are awesome and a quick way to turn a simple hairdo into a fancy one!
Continue Reading ...

Tuesday, February 14, 2012

T-Shirt Scarf - Part 4

I'm back with another t-shirt scarf today! 
For those of you who haven't been here, I have been sharing a different tutorial for a t-shirt scarf every week. Visit Part 1Part 2 and Part 3 to see what I have already shared.

....The Loopy Scarf....

Today's scarf is another no sew scarf. For this one I used two different shirts.
Next cut strips out of both t-shirts. 

Cut from armpit to armpit. Cut the hem off the bottom of the shirt. Then cut strips. Cut all the way off so you have individual strips. Stretch each piece to curl the fabric.
 
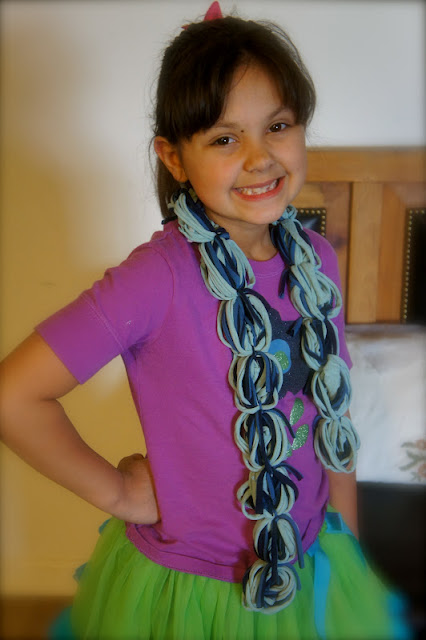
Once you have all the stretched strips, take two, one of each color and twist and fold them into circles. You can make large circles or small circles. For this one I made small circles. The small circles make a perfect length for a child's scarf. If you make your circles larger, they will be longer for an adult.

Cut some small strips from the top of your shirts to tie your circles together. I cute them about 4 inches long. Stretch those out too then tie the circles together making the scarf. You can cut the excess fabric from the ties or leave them. I left mine.
This turned out to be a pretty cute scarf. I like the tow colors mixed together!
And my daughter looks pretty darn cute wearing it! Wear it like a normal scarf, hanging straight down or you can slip one end through antoher circle to hold it in place.
And since today is Valentine's Day, we had fun with this picture for you.
{Happy Valentines Day Everyone}
It makes a pretty darn cute heart too!
I do have more t-shirt scarf ideas, so check back again next week.
Continue Reading ...

Tuesday, February 7, 2012

T-Shirt Scarf - Part 3

Hi Everyone! Are you ready for another t-shirt scarf? For those of you who haven't been here, I have been sharing a different tutorial for a t-shirt scarf every week. Visit Part 1 and Part 2 to see what I have already shared.

....Today's Scarf....
Today's scarf is very easy to make. I don't have a lot of pictures today. You won't need them. 
Just grab an old t-shirt. Use a salad plate and a piece of cardstock to make a template. Cut as many circles as you can from your shirt. I was able to get 12 circles from an xlarge shirt. Next, cut each circle in a spiral pattern.
Stretch all the pieces out. When you stretch out the spiral it looks wavy.
Now just take a scrap piece of fabric and tie all the pieces together. You can also just tie a knot instead of the scrap fabric, but I didn't like the thickness of the knot on my neck. Using a scrap piece made it more comfortable.
I got a request for me to model my scarf. LOL I don't usually model them myself. My daughter volunteered to wear this scarf this week. She looks cute. In fact, my girls have been wearing all of them to school. I haven't even been able to wear one yet. They have even got teacher gift requests. LOL That will make things easy. Anyway, here is my model for this cute scarf.
I like this scarf because it is light. You can wear it anytime of the year as a cute accessory. I haven't tried it yet, but it would be cute to take a few pieces and braid them too.

Also, while making these beautiful scarfs, I was able to make one for my daughter's friends birthday. I used the no sew method. I had to share it today because I love how it turned out. I used one of my dad's shirts. My mom had bought my dad and my hubby these bright tie dye shirts as a gag gift. Who knew that they would make great t-shirt scarfs.
My mom helped me make this one and you can check out her tutorial HERE. Oh and I got my mom to model it. LOL I promised close ups only.
Aren't the colors gorgeous!?! 
I am definitely making more of these! 
My mom has a really great blog (Pine Creek Style) that you would love. Make sure you check out her past posts and let her know I sent ya. If you love what you see, follow too! When she reaches 100 followers, she is giving away a beautiful set of jewelry made by her!

Visit the link here to read about the giveaway.
You could win this jewelry below.
Have a great day everyone. Be back here tonight to link up to the Create and Share Party!
Continue Reading ...