-

Friday, January 27, 2012

Pinterest Challenge - DIY Ruler Growth Chart

Remember last week I mentioned a Pinterest Challenge Party? Well I thought I would launch it today! I thought it would be fun to make some of my favorite {PINS}. I also thought that maybe you might want to link up your {PIN} projects.

Don't forget to grab a button HERE or below! 
Share the fun too! It would be great to see all those Pinterest inspired projects recreated.
Trendy Treehouse
Every Friday...stop by for the "Pinterest Party Challenge" 
You can link up posts related to a Pinterest inspired tutorial or project.

| Linky Party Rules |
  • Follow Trendy Treehouse via Google Friend Connect
  • Link up only posts related to this challenge. Not your home page
  • VERY IMPORTANT...Include a link to the original PIN. (where you got your inspiration) They deserve credit for their hard work too!
  • Please DO NOT link up none Pinterest related posts, shops or giveaways.
  • Share the i took the {PINTEREST} challenge button somewhere on your blog or in your post.
  • Visit at least 3 other link ups and leave meaningful comments.
  • Come back next week to see if your link has been featured and to share another fun Pin Inspired Project
Check out my Tutorial Below the Linky Party
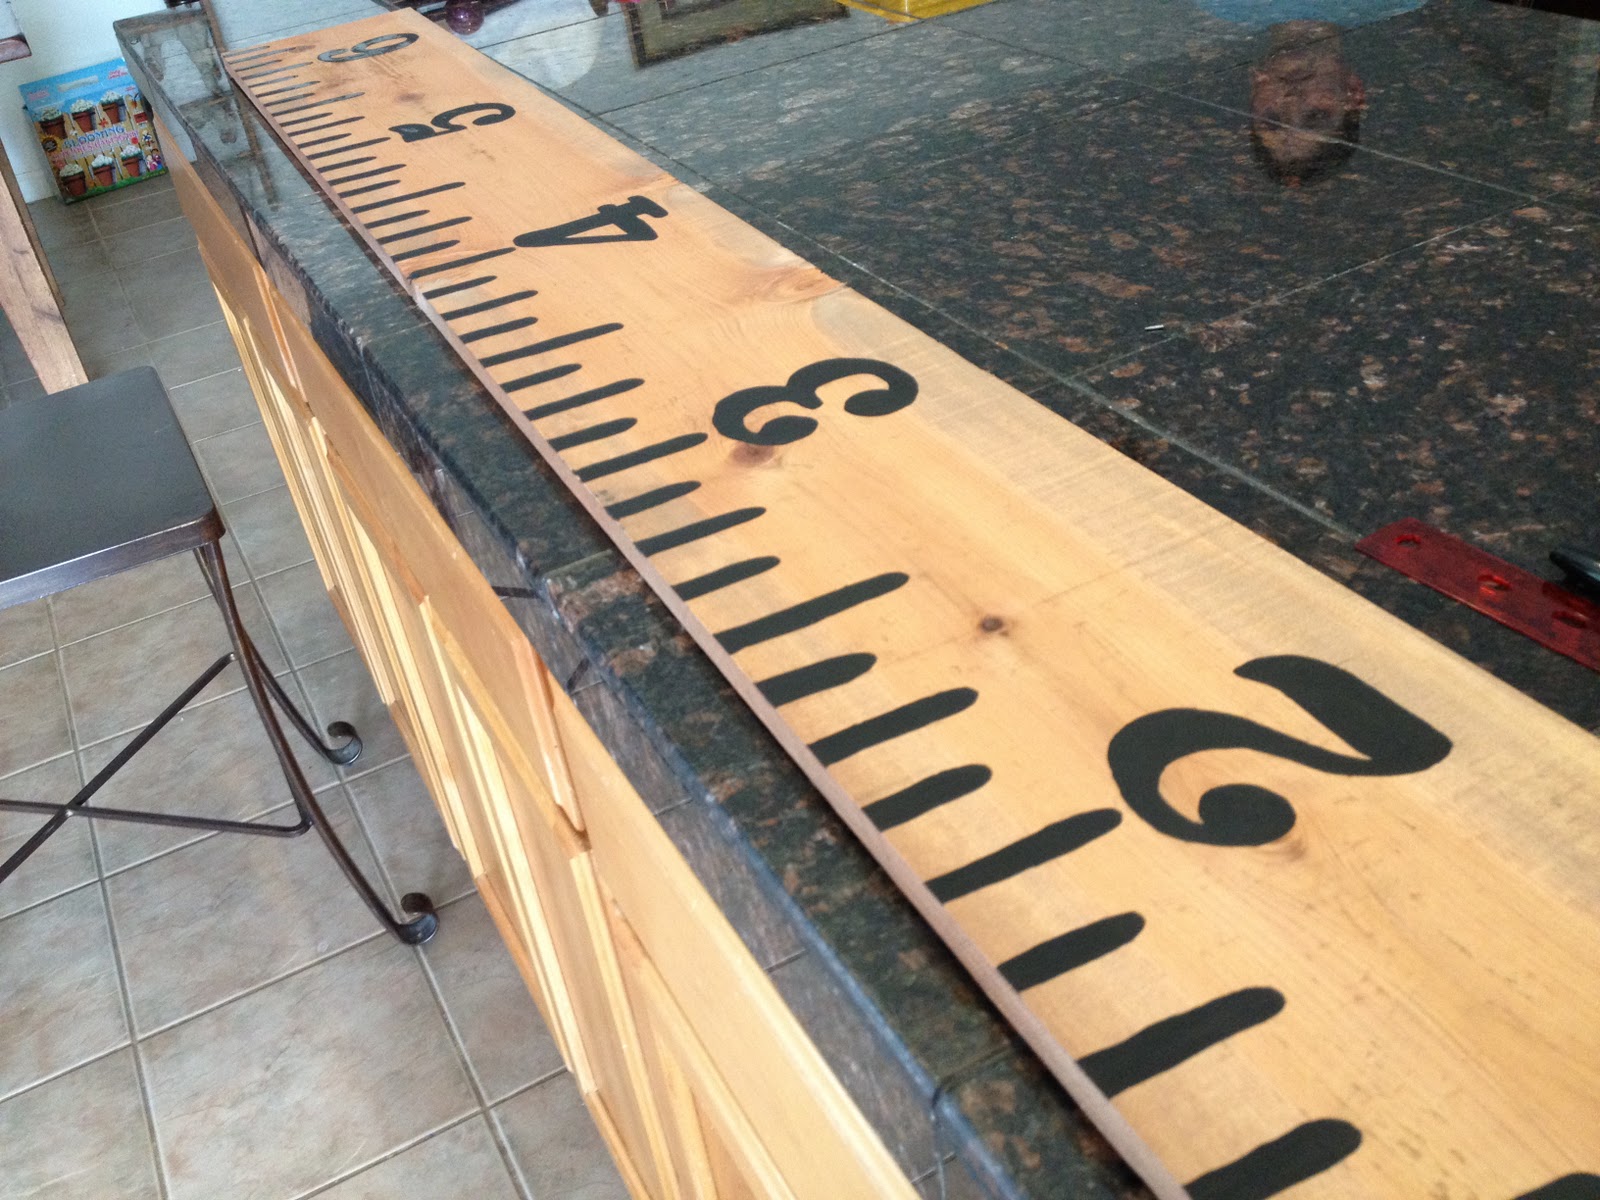
This week I made the Ruler Growth Chart. 
I found my inspiration HERE.
Can't wait to see your links. Have fun!
All unrelated links will be deleted. Thanks for following the rules.
DIY Ruler Growth Chart
Remember I got my inspiration HERE.
First I went to my local home improvement store to pick up some cedar fence boards. I chose the 6 foot boards. They had dog ears on them but they were happy to cut them off for me at the store. I took them home and planned on sanding them to make them smoother. Luckily hubby is a handy man. He had a planer and offered to run them through there first. They came out so good I didn't have to sand then at all.. I suggest you asking the home improvement store to plane them for you. If they can. If not, sanding is the way to go. I recommend a power sander. It will save your arms the pain. LOL
I stained mine all different colors. Staining cedar is a little tricky. I picked a few colors and my favorite was the CHERRY stain. It is the one I have pictured in most of my pic. Below is a pic of all three colors.


Next I measured and marked my board. I used my fabric measuring tape by taping it to the board so it would stay in place. I started at the top of the board at 77" We have tall people in our family and I wanted it to be at least 6 foot 5 inches tall. I took 6 x 12 + 5 to get my 6'5 measurements. By doing this you will be able to hang it on the wall. Just make sure you measure the wall too so you get the correct height.


Measure and mark each foot. Then each half foot. I added more lines in there too keeping them equally apart.


I printed out some numbers and different length lines. I cut them out to use as a type of stencil. I just taped the numbers directly on the board. The lines were easy, I was able to just hold them while I traced them. To trace, I used a black sharpie.


This is how the board looks after I traced them all out. You could leave it like this. (just make sure you erase those pencil markings) It looks cool this way too. But I chose to paint mine.


I used black acrylic paint to fill in my traced numbers and lines. It didn't take long. Just under an hour to complete. Minus stopping to make the kids some cinnamon rolls. LOL They were yummy looking. I didn't eat one. :( Go WILLPOWER! yeah me! Did you see my son in the picture? ;) haha!


Finally done! Now just add a clear coat finish to protect the wood and paint. Then hang, measure and enjoy. All your family and friends will want one too! Here is the final look. This one pictured is a gift. I didn't hang it on the wall for my final pic. Sorry. ;0) But didn't it turn out great! I think so.


Have you made one of these yet? How did you make yours? 
Leave a link in the comments so I can check it out. Or link it up in the party above.

2 comments:

  1. LOVE this! I've been wanting to make one for myself!

    ReplyDelete
  2. I have been thinking about trying this project for awhile. It's just so stinking cute.

    ReplyDelete

Thank you for taking the time to leave us a comment. We appreciate every comment and try to reply via email to as many as we can. Have a fantastic day!

UPDATE...Sorry I had to update my comments to be approved. Spam is now getting through. :(