Okay, I am back with part 2 of my Sticker Book Tutorial. Yeah! In Part 1, I showed you how to make the front with glue, scrap book paper, chip board stickers and paint markers.
This Tutorial is ideas of how to use your sticker book. I also included what I did on the back of the book. Also, since I shared with you my sticker book and mentioned I would share some of the stickers I had, they are in here too. Hope you have fun looking through this post.
What you will need....
- Stickers
- Glue Dots
- Scrap book paper
- A cute kid to help you
Here is what we did....
First, we took our scrap book paper and cut it according to the size of paper in our sticker book. (after cutting scrap book paper, DO NOT throw away your template. You will want to keep that in there between your papers of stickers so it stays sturdy)
Then have your "Cute Kid" pick stickers out of a sticker jar. I use a sticker jar for my kids when they accomplish something or do something to make them proud. This is the fun part for the kids. Getting to sift through all the fun stickers and picking just the right one.
Take your Glue Dots off, one at a time and let your "Cute Kid" place them on the back of their sticker. ( Since they may want to use them someday, you don't want to remove the protective backing. Plus the glue dots will keep them in place from slipping around the scrapbook paper.
Now the fun part, start placing stickers on your scrap book paper. Have fun with it. Use, favorite stickers, puffy stickers, glitter, chip board, just about any sticker your kids love.
Look at how cute that looks. And look how happy you just made your lil one. They will love showing this off.
Final step for this page... Slide your newly decorated sticker page into your sticker book. Enjoy!
Continue to fill your sticker book with decorative scrap book paper and fun stickers over time. You and your child will enjoy sharing and looking through it for many years to come. I know, because I still love looking at mine. LOL
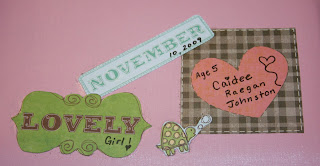
I can't forget to share with you the back of her sticker book. My book has my name, age, and other fun info. So we added it to hers too! Plus a few cute cut outs. I secured them with E6000.
Now here are some of the sticker from my sticker book. You may remember some!!


Sharing at...


this is adorable! What a good time I am sure they had making this book!
ReplyDeleteThis looks like a fun project.
ReplyDeletevery cute!
ReplyDelete