-
Showing posts with label DIY. Show all posts

Sunday, October 20, 2013

Fun with Refashioned Furniture

Have Fun with Old but Refashioned Furniture
In the quest of creating a warm and cozy home, we're always looking for new ways to freshen up our décor. One of best ways to do that is to take old items inside the house and refashion them into something completely new.
Before throwing old household items away, find new use for them with these awesome repurposing ideas!
Drawers as Open Shelves
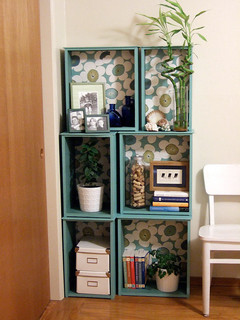

Before you get rid of that old desk or dresser, why not take out its drawers first and turn them into shelves. Turning your drawers into open shelves gives you more storage space, while giving those old storage solutions a new purpose.
Grab several drawers and hang them up the wall in any fashion you want, then use them as open shelves for your books, picture frames, and other knickknacks. You can even just stack them on top of one another if you don't have the time to mount them up the wall. And if you want to make your drawer shelves more appealing, you can revitalize them with a fresh coat of paint or varnish to make them look good as new.
Door Turned Headboard
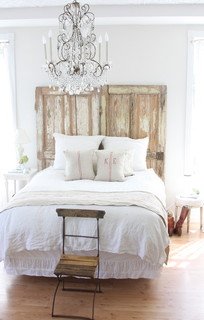

If you've done some major redecorating in your home, you might have taken your door off its hinges. Don't let it gather dust in your garage or basement; instead, repurpose it into your new headboard.
Simply prop up the door on your wall and push your bed against it. You can let it stand as is or repaint it to match the design theme of your bedroom. If you want to go the extra step, you can attach small wall sconces on your new headboard for some lighting for your daily nighttime reads.
Photo Frame Message Board
If you recently switched out your picture frames, don't throw the old ones out just yet. You can use your old photo frames as cute message boards in the kitchen or living room.
Take out the back of the frame (if it still has one), then attach or tie a net with the same size as the photo frame to serve as the "board." You can also paint the frame and the net to add a bit of flair to them. Afterwards, use colored clothespins to serve as note clips. There you have it -- an easy-to-do message board! You can also clip and display family photos here for a more personal touch.
Another cute option for old frames is to turn them into chalk boards. This project is a piece of cake as well. You'll only need some chalk board paint to coat the board of your frame, and you're done!
Mirrored Serving Trays
Large Shabby Mirror Distressed Vintage Cottage Chic Romantic White Wicker AS IS Homco by @AnnClarkInteriors | classic as a wicker chair.
There's always that one old mirror that doesn't fit your décor but you don't want to throw out just yet. Upcycle this odd mirror into a tray to serve drinks with whenever you have guests over.
Any vanity-sized mirror will do as a serving tray. You can even attach handles (old door handles are perfect for this) to your tray to carry plates and glasses with ease. When not in use, you can just hang up your mirror tray in the kitchen or dining room as a display -- a definite perk!
Vamped-up Jewelry Holders
When you have an excess of tiered trays sitting around in your kitchen or china hutch, grab one and take it to the bedroom! The lovely designs on the plates instantly turn a vintage tiered tray into a classy jewelry holder where you can store and display your bracelets and rings. You can also use this tiered jewelry tray as a cell phone and MP3 player holder.
To keep your necklaces tangle-free, you can take an old towel bar from your bathroom and attach shower curtain hooks to it. Hang your necklaces on the hooks to keep them more organized and to let you easily choose which one you're going to wear for the night.
With a little creativity and a bit of enthusiasm, you can turn normal household items into extraordinary décor pieces. Do you have other repurposing ideas for household pieces?
Jennifer Lutz is a home décor enthusiast who writes at http://blog.christmastreemarket.com. She recently published an article on adding a Vintage Touch to your décor, which can be found at http://blog.christmastreemarket.com/2013/08/vintage-home-decor/.
Continue Reading ...

Sunday, September 8, 2013

Repurpose Vintage Decor with Jennifer Lutz

How to Repurpose Treasured Vintage Décor
As a practical home designer, one of the biggest challenges is finding new uses for old home items. Whether the piece you want to repurpose is a family heirloom, a long-forgotten object from the attic or garage, or even a vintage find you came across at a flea market, the wonderful thing about repurposing is that you can preserve the piece's sentimental value while finding the perfect place for it in your home.
In a recent trip to my mom's new house, I discovered some vintage items lying around that could use some sprucing up. They have all definitely seen their fair share of wear and tear over the years, but with some retouching, I'm positive they will be good as new. Here are some of my ideas on how to find new uses for them:
From Vintage Fireplace Grate to Country-inspired Wall Art
If you're short on wall décor, a vintage fireplace grate can be your next wall accent piece. Simply mount the grate on your wall to add a rustic highlight to your home. You can hang the grate on your living room wall to create an interesting focal point, or above your headboard in the bedroom for a more dramatic look.


Rustic Wooden Chest Turned Stylish and Functional Coffee Table
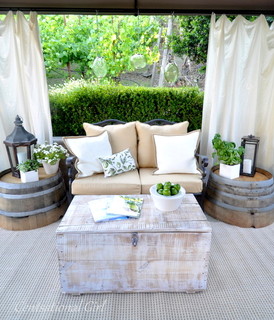
For some reason, I always find myself with limited storage space in my home. This is why items, such as this classic wooden chest, can be considered a godsend due to its potential as a functional and stylish accent piece. With its wide, flat surface, you can turn this wooden chest into an ideal coffee table for your living room or outdoor spaces, while its interior can still be used for storing your kids' toys or books and magazines. You can varnish it, repaint and distress it, or leave it as is for a shabby chic look.


You can also place it at the foot of your bed with a cushion on top, and use it as extra seating in the bedroom plus storage for your blankets and other bed linens.


Antique Storage Trunk to Console Table
For avid collectors of vintage décor, a storage trunk is a definite favorite. With its rusty metal frame and aged wooden exterior, it exudes an antiquated charm like no other.
A great way to use this classic piece in your home is to turn it into a functional console table to display cherished keepsakes or family photos. Just like wooden chests, you can also still use it for storage.


From Vintage Chair to Coat Rack
Chairs are often one of the trickiest pieces of furniture to find new uses for because their frames are specifically made for, well, sitting on. But you don't really need to repurpose the entire thing. You can just focus on using one part of the chair.
I found this project on Facelift Furniture, where they transformed a chair back into a coat rack. Just remove the seat of the chair, and then attach hooks to the base of the back of the chair or to any part of its wooden frame to make it into a coat rack. With this newly repurposed item, you have not only a rack for displaying coats or pots and pans, but also an interesting piece of wall décor.
Old Windows Frame New Art
Create a portal to another world by transforming this detached window into a rustic wall accent. I love this particular item because it preserves a piece of family history and adds visual interest, character, and a bit of texture to the wall.
The large glass panes allow you to display treasured family pictures or pieces of art while the faded wooden frame adds to its vintage aesthetics.


Vintage pieces are always a delight to find. What they lack in novelty, they make up for in elegance. And while thinking up of new uses for them may pose a challenge at first, the chance at preserving a piece of family history makes it all worth it.
Jennifer Lutz blogs about Home Décor and related subjects for www.christmastreemarket.com. She produces the Home Décor 101 series on their blog. The latest article in the series can be found at http://blog.christmastreemarket.com/2013/09/furniture-arrangement/.
Continue Reading ...

Saturday, July 27, 2013

DIY screened patio

When we bought this house 15 months ago we knew we wanted to make the back patio screened in. The bare bones of a screened patio were already in place. But we don't like to put things on the credit card so we decided to wait until we could pay for the room or supplies in cash. We had a contractor who makes screened patios come and look at the space and give us a rough estimate and it was at that point that we knew this was something we'd have to do ourselves if we ever wanted to get it done. We could not afford the thousands of dollars that the contractor was stating it would cost. Around Christmas time last year we got some pretty nice cash gifts and have put them aside for our screened patio. 

Once we had the money we knew we just needed the time (easier said than done). Last year our kids spent a few days with Greg's mom and sister (and niece and nephew) on the family farm and then headed up to Indy with Greg's mom...so we wondered if we could do that again. It all worked out that we'd take the kids to the farm on a Wednesday and then drive to Indy ourselves to join them on a Sunday giving us four days at home without them. I cannot imagine trying to tackle this project with the kids running around. My mom kept Abi during the days so that I could work on another project inside the house. 

So, with the help of up to 10 people (but mostly just 4) this room came together in two and a half days!! Now, it's not completely finished because we ran out of money but you better believe we will keep saving and we will eventually get the rest of the space looking like we want it to...like adding a ceiling, painting the concrete floor, etc. I cannot thank the men who came to help enough. They took time out of their busy schedules to help us get this room finished. I think we'd still be working on it without their help! They were kind enough to let me pay them in sandwiches, fruit, pizza and beer (just not all at the same time). So, without further adu...here's the diy screened patio...

Before: this is how the room looked before we started...this isn't how it usually looked. This room is usually filled with toys and a patio table. We were excited to get this project underway!

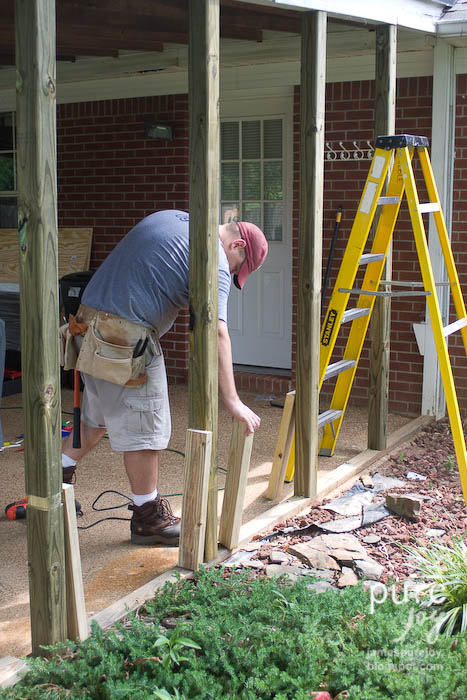
Framing out the 2ft wall..


Lots of paint to help waterproof the wood a bit.


On day two the screen went up as well as the finishing boards and more paint.

Starting to really take shape!!


On day three doors were hung and more finishing touches were made. We're still not completely done, like I said, but it's functional, livable and I LOVE it!!! It's so fun and nice to not be moving so we can actually do home improvement projects!! And we have some great friends and family who are willing to help us make those dreams a reality!

Another item on our list is to build this area up a little and do some landscaping...the rain water likes to collect near that downspout...so we need to build it up!

The finished product! Isn't it great!!? And I'm sure it will help add value to our house as well!

Here are a few before and after photos.
Before, during and after 
What a huge difference!! The kids are going to be so excited when they get home and see this!!


Continue Reading ...

Thursday, July 4, 2013

Silhouette America Promotion & Project

Promotion extended until July 14th. You still have time to order your silhouette bundle!!

I am very excited to be sharing a promotion from Silhouette America that you are going to love. From July 1st through July 10th you can get at Silhouette Portrait or Cameo, including the Design edition program at a great discount.

I myself have the Cameo and am in love.  I made a fun project below that you will want to check out. But first, check out the deals you can get. 
You can click on the photos below to go directly to the promotions to buy one now.
The Portrait and the Cameo are so fun to use and so very easy.  But there is something pretty cool about getting to use your own designs.  That is what I love about my upgrade to the Silhouette Studio Design Edition.

Compare for yourself below.
Check out what I made with my Silhouette Design Software and Cameo.

It was so easy and fun for me and all my girls.  They LOVE the band R5 and wanted something special made just for them.  So with my program, I made the R5 logo, bought some silhouette heat transfer material, onesies and made these cute clothes for the girls stuffed animals.
Using the Cameo and Program was quick for this project.  All I did was load the logo in to my library as a cut project. Next I opened it and used the Trace Tool.  First I selected the logo, changed the threshold to how I liked.
Then I moved my image over and deleted the excess lines.
Next I used the Trace and Detach tool to get my image ready to cut.
Once you Trace and Detach, highlight the whole thing and right click to group them together.  I also set my registration marks around my logo to help guide the Cameo.  That was it and it was ready to send to the machine. Just click on the top left icon next to the printer icon to send it to get cut. (Don't forget to load the heat transfer paper shiny side down)
 Follow the simple directions and soon you will have the image cut and ready to use.
Once I had my image cut, I cut it out with scissors, used my Silhouette Hook tool to remove the excess material. Place it on your shirt and cover with a thin clothe.  Iron for 60 second.  Let cool and peel away the plastic. Your shirt is now ready to enjoy. Didn't they turn out cute?!?
Here is a Youtube Video you can check out to also see how to use the machine and heat transfer material. I am visual, so seeing it may help you too. 
So after seeing what I made, I know you want to get one of these Silhouette bundles for yourself, right? ;) ;)

Visit HERE or the direct link below to get yours ordered today!

Thanks for stopping by to read along today. 
Remember the Promotion ends July 14th!!
Continue Reading ...

Friday, May 3, 2013

DIY: Avocado & Banana Face Mask

Today Kendra is bringing us a great recipe for a refreshing facial mask. Thank you Kendra!

All-Natural DIY Beauty: The Avocado and Banana Face Mask

In honor of Pregnancy Awareness Month, we want to help moms everywhere to take some time out to unwind and pamper themselves. With the stresses of managing your household and tending to everyone's needs but your own, moms can frequently feel a little frazzled. That's why taking time to treat yourself to a luxurious at-home spa treatment is one of those many crucial "me moments" that every mom should occasionally have.

Throughout my career in the travel sphere, I have been fortunate enough to experience a great deal of breathtaking views.  A personal favorite for family and business, Honolulu is one of the most stunning places in the world.  As the most geographically isolated area of the globe, the island state always leaves me feeling relaxed - even as a mama of three, a hard feat at that!  

Honolulu is also home to some of the world's greatest spas. At the Royal Hawaiian Hotel and Spa, ranking amongst Honolulu’s best hotels for spas and facials, guests can indulge in the Abhasa Tropical Facial. Using simple ingredients from nature, many of which can be found in gardens and grocery stores, this beautiful treatment puts moisture back into the skin naturally.

You might not have any plans to jet off to Hawaii in the near future, but you can still treat yourself to a beautiful at-home mask inspired by the Abhasa Tropical Facial. This mask is moisturizing enough to soothe dry and sensitive skin types, but shouldn’t cause blemishes for those who are oily or acne-prone. Here's how to make the Avocado and Banana Face Mask for your at-home spa night.
Avocado and Banana Face Mask

You'll need:

1 Avocado
1 Banana
2 tbsp Olive Oil
1 tbsp Honey

What to do:

Mix the olive oil and honey together and combine with a whisk or fork. The honey won't fully mix with the olive oil, but that's okay. Mash the avocado, using a blender or food processor if necessary, and mix into the olive oil and honey. Mash the banana and add last to the mixture, vigorously mixing all ingredients together.

Be sure to fully cleanse your skin and remove all makeup before applying any mask. Apply evenly over the face, neck and chest. Excess mask can be applied to other areas of the body that need extra moisture or stored in a container in the fridge for a day or so. After you've applied the mask, allow it to sit for 10-15 minutes. Rinse off with warm water. Finish with a serum or moisturizer for truly luscious and resilient skin.

Thank you again Kendra for guest posting today & sharing this facial mask with us!
Continue Reading ...

Saturday, August 11, 2012

Craft Supply Organization

Do you have one of these (spice rack) taking up space, barely getting used? We got this for our wedding (almost 10 years ago) and have barely used any of the spices. The rack was on the top of my kitchen cabinets if that tells you anything. I did some research on spices to see how long I should keep them. I found out that if the spices have no fragrance when crushed then they probably aren't very good. Plus I had new bottles of spices that I used more frequently in my cabinet where I could actually reach them. SOOOO, instead of just getting rid of the spices, jars and spinning rack I decided to re-purpose the whole thing. 

I emptied the jars, washed them out, took off the labels and got to work filling them up with crafty goodness. Think, buttons, sequence, safety pins, glass beads, the options are endless really. I sorted my buttons by color for the top jars and then added my little headband making supplies to some of the bottom jars. I added random little supplies to the extra jars and now I've got a great little spinning craft rack! I LOVE it and it's SOO helpful to me. No more dumping out the WHOLE jar of buttons just to find the right RED one, etc.
I never really got a good picture of the "finished" product until I snapped this one with my phone while crafting the other night. It works great for me while making headbands and I don't even miss the spices that used to fill those jars!

I know I'm not the first person to do this...just thought I'd share it so those of you who maybe haven't seen it can get to work re-purposing your old unused spice rack. Think outside the box, there are lots of things that would make GREAT craft storage units!!
 
Do you have a crazy big ribbon stash? I know there are TONS of ways to store ribbons and I've seen a few lately that I really love...however, I don't have a lot of space so most of those cute, creative ways don't work for me. My craft "room" is a corner in my master bedroom and I already get in trouble for the amount of "stuff" I have so I'm trying to make the crafts disappear and not take up more room, or be displayed... someday maybe!

Anyway, I had all most of my ribbon spools stored in a clear shoe box. It worked for the most part but I felt like it was just taking up too much space. Again, this method of storage is not original to me, but I can't remember where I saw it the first time. I took a package of clothespins and wrapped the ribbon around a clothes pin. Clothes pins take up a LOT less space than those big cardboard spools do. So I wrapped all my ribbon on the clothes pins and then put them in a large (emptied) twizzler bucket. They now take up 1/2 the space and I have a free clear plastic shoe bin to store other bulkier items in. I need to get a few more clothes pins so I can get ALL my ribbon in one place but it works great and I can easily see and get to whatever ribbon I need!!
Look at the difference in space that the ribbons take up. 
Plus, I think it looks cuter this way too!
I would LOVE to see some of your craft supply organization...as I said before, I have a small space so I need some good space saving techniques!! PLEASE SHARE! Link up your craft organizational techniques in the comments!!

Tomorrow I will be 32 weeks pregnant!! So excited to meet this new little lady...but SO much to do before she gets here! Hopefully the nesting will kick in full force once the big kids are in school and I have a little more time (and hopefully energy) to get the list accomplished!!
Continue Reading ...

Thursday, September 15, 2011

Vintage Luggage Makeover

This beautiful case belonged to my grandma. She gave it to my mom and my mom recently gave it to me. YEAH! I have admired it for years! So I was very excited to take this home! I knew exactly what I wanted to do with it!
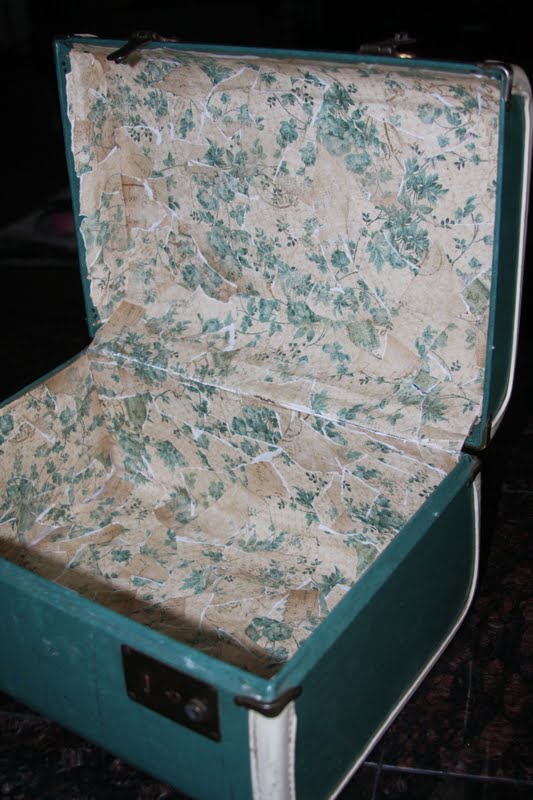
This is what she looked like inside!It had been decorated a couple times. LOL First with what was like contact paper. And then the rose wallpaper. It pealed right off. However the paper did not come off to good. I decided to get off as much as I could and just decorate over it!
I found some scrapbook paper at Michael's on clearance for 98 cents. I loved it and thought it was perfect for my vintage case. I was really excited to get home and see how well the greens went together. This paper was made for this!
I tore up the paper (I wanted the torn look) and used Matte Mod Podge to secure it into place. I covered the whole inside of the case.
Here is a pic of the finished mod podging. I think it turned out pretty cool!
When you close it, because of the fabric, the paper bubbles. So I added some cute fabric to make it look a little more finished. I just ironed the fabric and hot glued it into place. It matched great too!
I even added a little fabric to the outside handle. Its so cute. Glad I decided to do that!
I am now using my case to store my perfumes and everyday jewelry. I just may use it on our next trip too! ;0)
I Love it! Have you fixed up an old vintage case? What did you do with it?
Continue Reading ...