-
Showing posts with label downloads. Show all posts

Thursday, November 15, 2012

Signs By Andrea Review & Giveaway

I am very excited today to share with you an exciting site that offers instant custom signs for your home.  I was contacted by Andrea and asked to check out her "Customizable Family Rules Printable".  I have been wanting to make one for so long now and just hadn't gotten around to it.  So I was very excited to check it out! I immediately went to check it out.

Look at what I customized for my "Family Rules"
Isn't it AWESOME! I love it and it was so easy to make. Just visit the cool word builder tool HERE and start creating your own! You can add a bunch of rules that are ready to go or create your own rules! I added a couple of my own, but I loved the choices she had.

I also think you will love the different styles offered too! The one I did above is style "Kitschy" I liked the look and I also liked the black background.  But there are so many other styles. 9 different styles to be specific.

Here are a couple others I made up to show you.

"Distressed Style"
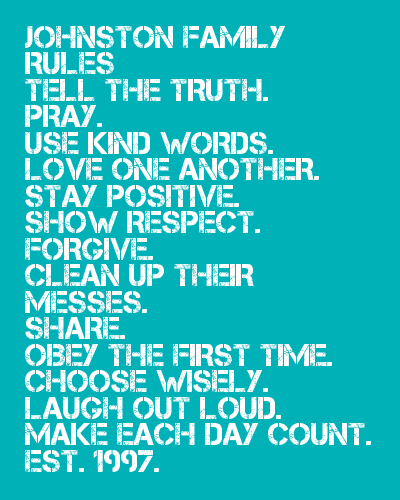
"Wallpaper Style"
Aren't they cute!?! I knew you would love them! Another great thing about this tool is that if you don't exactly love the order of the rules, you can just click and drag them into the order you like. Very simple!

If you need a little help learning how to use the tool, there is a video you can watch.  Click below to watch. You will be making one for yourself right away after you see how easy it is.

Another great printable they offer is the "Special Dates" printable. It works just like the Family Rules, only you can add in your special dates. You can go to their Special Dates Artwork Builder to make yours. You can choose from 3 to up to 9 dates for your sign. For mine, I choose 8. I added in mine and my husbands birth dates, the date my husband and I got together, our anniversary and each of our 4 kids birthdays.

It's really simple, just pick how many dates you want, then add in the dates, click on create my date artwork, select from 5 different styles, and then choose if you want to get a PDF or have it printed. It's so simple.

I changed the dates, but this is the style I went with.
I love it because it has a little heart with white letters for the date we got together. So cute!
Here is another style I liked. A little simpler. I kept the same fake dates for this example. LOL
Check out Signs By Andrea on Facebook & Twitter too! Don't forget to like her pages and let her know you found them through Trendy Treehouse! ;)

Giveaway Closed - Winner will be emailed. 
Thanks to all our entries here, FB and on Instagram.

Have fun creating your Family Rules Printable!

Thank you so much to Andrea for offering this giveaway and of course for my lovely printables! I printed them up and they are so vibrant, and well made. I can't wait to hang them in my house!

You will have until  December 7 @ 9:00 p.m. Pacific Standard time to enter this giveaway. The winner will be chosen by random.org and announced here. If the winner has provided an email address I will contact you. If you don't provide your email, you will want to check back here and see if you are the winner. The winner will have 48 hours to contact me or a new winner will be chosen. This giveaway is open to those living in US only. You must be 18 years or older to enter. Thanks for entering at Trendy Treehouse. Good Luck and Have Fun!!

By entering this giveaway you agree to Trendy Treehouse Disclaimer/Terms of use.
Continue Reading ...

Friday, February 10, 2012

Pinterest Challenge - DIY Vintage Valentines


It's time for another Pinterest Challenge Party?

Don't forget to grab a button HERE or below! 
Share the fun too! It would be great to see all those Pinterest inspired projects recreated.
Trendy Treehouse
Every Friday...stop by for the "Pinterest Party Challenge" 
You can link up posts related to a Pinterest inspired tutorial, recipes, projects, ect. Basically something you love, found on Pinterest that you want to make.

NEW...I opened an ongoing party for you to join too. I made a board on Pinterest strictly for my Top To Do Projects. It's called My Pinterest Bucket List. I even included an image for you to download and use. Read more about it HERE or find it in my Top Bar below the header on the right. There only one rule. ;-) Please leave a comment below the party so I know there is a new bucket list to check out!

| Linky Party Rules |
  • Follow Trendy Treehouse via Google Friend Connect
  • Link up only posts related to this challenge. Not your home page
  • VERY IMPORTANT...Include a link to the original PIN. (where you got your inspiration) They deserve credit for their hard work too!
  • Please DO NOT link up none Pinterest related posts, shops or giveaways.
  • Share the i took the {PINTEREST} challenge button somewhere on your blog or in your post.
  • Visit at least 3 other link ups and leave meaningful comments.
  • Come back next week to see if your link has been featured and to share another fun Pin Inspired Project
Check out my Tutorial Below the Linky Party
I found a cool {PIN}spiration on printing on paper bags. It gave me an idea for some valentines. Check out how I made mine below the link party.
Can't wait to see your links. Have fun!
All unrelated links will be deleted. Thanks for following the rules.
PLEASE READ...I am getting a few more link ups that don't apply and don't always have time to get them off right away. Please remember to only link up posts that relate to this part. You can link up all others to our Create and Share party on Wednesdays. Thanks!
DIY Vintage Valentines
Remember I got my {PIN}spiration HERE.
I love the idea of printing on paper bags and am going to remember that for future projects and gifts. But it did give me a great idea for making valentines this year.

...What you will need...
Brown Paper Bags (Large from the grocery store)
Scrapbook Paper
Computer and Printer
Vintage Valentine Images
Glue
Scissors
Decorative Scissors

First, cut your paper bag to fit your printer. I cut mine to 8x10. You can always go larger by taking your images to a printing shop.
Below is the image I made up in PS. 
Feel free to save it and use for personal use only. Thank you.
Once you have it saved, print it out on your paper bag. Cut each image out with decorative scissors.
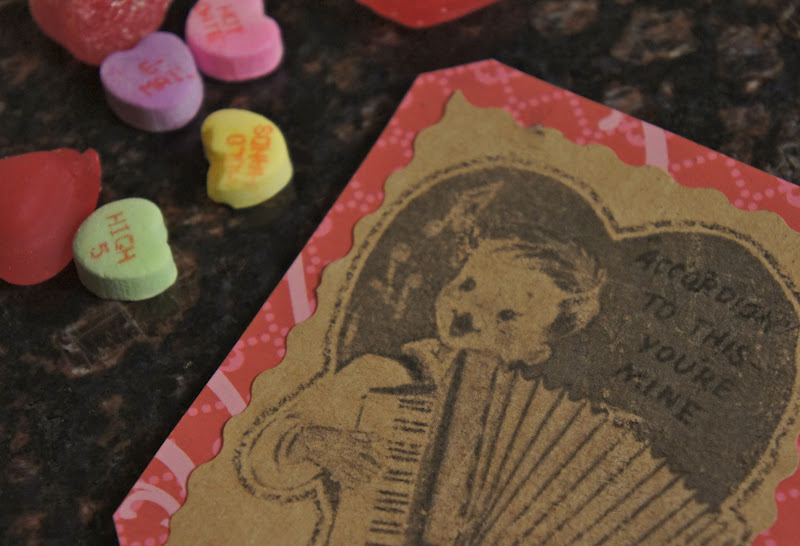
Then just glue your cut images onto some cute scrapbook paper. Fill in your message on the back and they are ready to give.
These will be cute to hand out and are so quick to make!
Continue Reading ...