-
Showing posts with label Play rooms. Show all posts

Monday, January 7, 2013

The Elephant Project

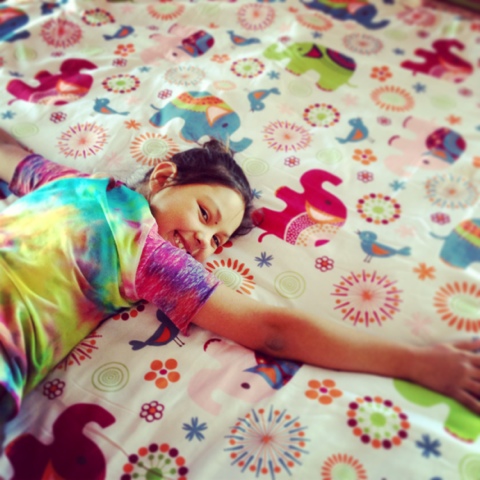
So my little one got her new bedding a couple days ago and she was so excited. She loves elephants and when I saw this set, I knew I had to get it for her. As soon as we opened it up it was on her bed and she was all giggles. She had no idea I had ordered it so it was a complete surprise!
And the elephant project has begun! We made a template of an elephant from one of the new pillow shams and started working!
I have to apologize, I don't have a pic of the template or that process, sorry. But we made the template out of card stock and traced it out on scrapbook paper. Cut a bunch of designs out and set them aside. I wasn't sure what patterns I wanted just yet.

Next, I had an old sign that was damaged and decided to use it as my base.
I painted it pink. It did take a few layers because of the original image, but it didn't take too long.
Next, I wanted to add some sort of background to it and grabbed my stamps. Once the paint was dry, I just used the stamp on the whole board not worrying about overlapping.
I played with different patterns and these three were my favorite. Lastly, I just used Mod Podge to seal the elephants on and to give it a nice finish.
One "Elephant Project" down! She helped me pick a place to hang it in her room.  Right by her closet so she could see it when she lays in bed! LOL
What do you think? Cute, right? We think so! I have a few more elephant projects in mind and will be sharing them on here too! I can't wait to finish her room and share the whole room! Slowly getting there. ;)
Continue Reading ...

Friday, March 2, 2012

Pinterest Challenge - You is...

It's time for another Pinterest Challenge Party?

Don't forget to grab a party button HERE
Share the fun too! It would be great to see all those Pinterest inspired projects recreated.
Trendy Treehouse
Every Friday...stop by for the "Pinterest Party Challenge" 
You can link up posts related to a Pinterest inspired tutorial, recipes, projects, ect. Basically something you love, found on Pinterest that you want to make.

| Linky Party Rules |
  • Follow Trendy Treehouse via Google Friend Connect
  • Link up only posts related to this challenge. Not your home page
  • VERY IMPORTANT...Include a link to the original PIN. (where you got your inspiration) They deserve credit for their hard work too!
  • Please DO NOT link up none Pinterest related posts, shops or giveaways.
  • Share the i took the {PINTEREST} challenge button somewhere on your blog or in your post.
  • Visit at least 3 other link ups and leave meaningful comments.
  • Come back next week to see if your link has been featured and to share another fun Pin Inspired Project
YOU IS...Prints
See these larger below the linky party
PLEASE READ...I am getting a few more link ups that don't apply and don't always have time to get them off right away. Please remember to only link up posts that relate to this part. You can link up all others to our Create and Share party on Wednesdays. Thanks!


You is... Print
Remember I got my {PIN}spiration HEREI love this print!

...My "You Is" Prints...
Here they are. My "You is Kind, You is Smart, You is Important" Prints
I made these to match my kiddos bedrooms and I wanted them to have their names on them. I thought it would be cute to add the bunting too.
 I made all four of these in Photoshop and found the bunting brush too HERE. First I opened a new page (size 8x10). I added a background color that matched their bedrooms. Next I added their names close to the center of the page, also in the color I prefered. Next I typed (in white) the "you is" quote. Then I raterized it so I could erase some of it. I erased the words that were behind the kids names. It helps the name stand out. I then added a new layer for my bunting brush. Made the bunting the same color as the name by using my paint bucket tool. I added a second bunting layer to get the swag look. And that was it.

I plan on printing these out, matting and framing them for the kids rooms. They are going to look so cute and fit right in with the colors of their room!
I'll share photos of their rooms soon. We are painting and redecorating. They were very excited to go to the paint store and pick out colors. So room updates coming soon....
Continue Reading ...

Sunday, March 28, 2010

✻ Guest Blogger ✻

It's time for another great "Guest Blogger" This week we have Stephanie from Under the Table & Dreaming. And I am excited to share with you her sons amazing "Play Room"

UndertheTableandDreaming


Hi there! I’m Stephanie Lynn from Under the Table and Dreaming. I’m thrilled to be hanging out in the Trendy Treehouse today. I am a blessed mommy to one precious little boy and married to one of the greatest guys ever {who also happens to be my best friend}.

I started my blog to share a little piece of my world as a mommy, which I consider to be the most important job ever. I love to craft, decorate, create, and cook; plus everything else ‘us’ mommies do in-between to make our house a home.

Come see what else I’ve been up to over at Under the Table and Dreaming. I have lots more to share and hope you’ll stop by and visit.

~ A Playroom with Room to Play and Space to Grow ~


I had two major goals when creating our little guys playroom; a functional room for him to play & learn and a versatile space that could easily grow with the ever changing needs {and wants} of a three year old toddler. We choose a room located on our first floor main living level to transform into this magical space. Since the area can be visually seen by visiting guests {and me, everyday} I had a two items that topped my priority list when planning the space; 1. A neutral & natural decor to somewhat blend in with the rest of our home and not particularly scream playroom and 2. Lots and lots of hidden storage.


It took awhile to find all the right elements to bring the room together but I could not be any more happier with the outcome {and our little guy loves having a space all to himself as well} I feel the priorities were met without compromising the fun feel a playroom should have and a space that captures the personality of my little guy. Would you like to see what we have been up to?


I love the addition of unique pieces as storage options. This 27 inch wooden dough bowl was found at a local antiques mall and is the perfect home for matchbox cars and trucks.


The room has two windows which are dressed with black long panels and wooden mahogany blinds. Under each window sits two wooden toy chests that I covered with batting and velour fabric. They provide additional hidden storage which is a necessity in any toy filled household.
Between the two windows sits an eight cubby storage unit filled with cream and espresso canvas totes; More hidden storage...have I told you how much I love hidden storage.


The handmade art above the cubby is a rainbow of the little guys handprints. {You can find my tutorial here} It's a great color learning piece. On top sits a wooden marble run which is just too cool not to display. Burl wooden bowls are another one of my favorite decor accessories ~ I simply can not pass these up any time I spot them.


A vintage wooden munising bowl showcases the colorful marbles for the marble run.


The bottom two cubbies were left open for a couple easy reach toys like this wooden car ramp. Another munising bowl was used to hold the cars.


The second open cubby holds a vintage wire egg basket filled with Lincoln Logs.


Centered in the room is a cream 10X13 shag rug to provide some tiny toe comfort and accent the wooden floors.


Even some toys themselves provide excellent storage options.


Comfortable seating was another one of my must haves in this space. This espresso twill couch is a great snuggle and read spot. Two paper shade pendant lights hanging in the corner create perfect wind down ambiance at the end of the day.


Above the couch is an oversized paper roll and wooden holder found at Pottery Barn Kids last year. Since we are working on the alphabet now, I printed and cut out 8X10 letters on brown kraft paper and simply attached them to the roll with a glue stick. It's perfect for filling up the large wall as well as creating a focal point.


What playroom isn't complete without a vintage sock monkey...


More handmade wall art - This creation was inspired by PB and is a very easy and low cost project {find more details and my how-to on this post}


Utilizing more toys as storage...


A vintage wall box with a lollipop hanger creates additional fun storage.


As much as I would have loved to have a full play kitchen in this room the space just did not allow; so I opted for a more manly wooden grill for my little guy. The colors were a little too bright for the space, but nothing a little custom paint job couldn’t cure.


The wooden crate boxes under the grill and easel provide yet more hidden storage. I printed out the labels using the same font and paper as the paper roll alphabet and glued them to the front. Stacked wire puzzle racks provide an organized display for the wooden puzzles.


More 'diy' canvas wall art ~ our own live-by wishes for the little guy. {You can find more details and instructions on this previous post}


Because this room is visible on our main living level, hidden storage was a must. This cubby and drawer wall unit combo is the perfect solution for neatly concealing everything a three year old could possibly dream of.


A combination of espresso and vanilla woven baskets fill each cubby and we have managed to pack them all full of goodies.


A chalkboard tag hangs from each basket and {because I am too conscious of my own handwriting} I printed out the alphabet with a typewriter key font to label each one.


Extra space on top provides a perfect area to display some rustic, vintage inspired favorites.


I have a love for all things oversized, unique, and unusual.


I am always on the lookout for these and have a hard time passing them up.


The activity table in the center of the room is used for just about everything under the sun. It provides a great work space for my sons therapies {as well as arts & crafts, trains, cars, you name it}


The lower shelf stores easy to reach train tracks, rails and cars.


And you can't forget something for their cute little bums...


...though my little guy prefers to stand {on top the table at that}
I can officially say we have one room that is completely finished without any to-do's...except to have fun! Enjoy!


Thanks Stephanie !!!

If you are interested in being a GUEST BLOGGER please let us know by filling out our CONTACT form. Please include the post you would like to use.

Continue Reading ...