-
Showing posts with label t-shirts. Show all posts

Saturday, July 6, 2013

Bleach Pen T-shirt tutorial

I've shared the freezer paper stencil tutorial before and I LOVE a good freezer stencil painted shirt with clean edges, not much mess and quick turn around time. But some shirts call for a little more spontaneity...a little more blurred edges...a little easier prep (albeit with a longer wait time).

The bleach pen shirts are so easy to do, you just have to wait a while for the bleach to work...
I have used bleach pens on shirts in the past...
and this one...link on the picture.


Those were pretty easy to do since I just made straight lines with no significant design. I knew I wanted Micah to have a flag on his shirt since the girls had a flag on their shirts so I was trying to figure out the easiest way to make that happen. Of course freezer paper stenciling came into mind and while it always turns out great it's kind of a long process with having to cut everything with an exacto knife (because I'm not cool enough to have a silhouette machine that would cut the freezer paper for me) so I decided that I'd use the bleach pen. At first I couldn't figure out the best way to make sure the flag actually looked like a stencil. But then I remembered how I would get my scripture verses onto my paintings so I could paint the words in a way that was actually legible. So...here's how I did it...

I printed out the flag stencil that I wanted to use. I got my stencil from here. Then I colored on the back of the stencil with some colored chalk (sidewalk chalk totally works if that's all you have on hand). Then (with a piece of cardboard inside the shirt) I just traced over the stencil and the chalk was left on the shirt where I traced! This method also works on canvas (that's why my scripture paintings come out just like the font most times :)...my secret it out!).


Then I just traced over the lines with my bleach pen and called it good. Please make sure to put newspaper or cardboard inside the shirt, otherwise you'll have the reverse image on the back of the shirt ;)


Then you just wait...wait...and wait some more.
Then you rinse the bleach (which has gotten crusty) off in the sink and dry the shirt. You can wash it right away too if you'd like. I didn't have time to wash it. I didn't wait long enough for the bleach to do it's magic either. I think I may go back and put the bleach on again to get a more "white" flag. One way to tell if the bleach is working or to see how much more time you might need it to look on the inside of the shirt. The thing with bleach pens is they do tend to 'bleed' a little bit so don't try to do some really detailed picture...it won't work very well.

Here's my crew in their Patriotic ensemble! 
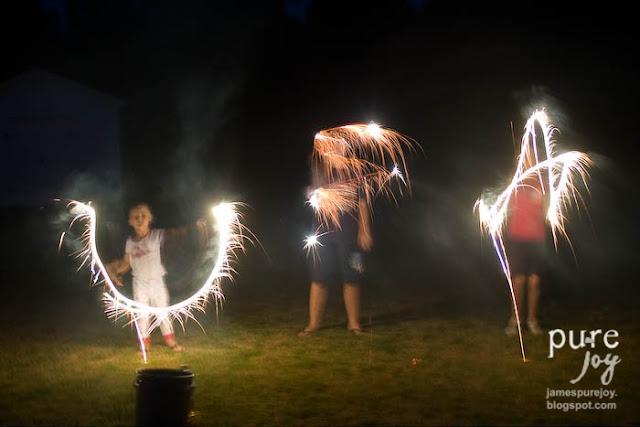
 And here's one photo from our sparkler fun on the fourth! I will be sharing more later on my blog!!
Hope you had a great and fun Fourth of July!! Here's to more summer fun!!
Continue Reading ...

Saturday, November 3, 2012

Sibling Shirts

I love to make shirts for my kids...and just clothes in general. Having a new baby sister was a GREAT excuse for me to make some shirts for my kiddos. I thought for weeks about what kind of shirts I wanted to make for the kids. I thought about each of them having a number, doing their initials and many other things. Tara sent me a few ideas and I liked the bodyguard shirt idea that she sent me (from cafepress) and so I started turning that over in my mind because I really liked the idea. So, I made the bodyguard shirt for Micah and then I figured I could do the bigger girls as part of the fan club. To differentiate Naomi and Hannah's shirts I added in the President and Vice President. I love the idea of the shirts but the execution of the shirts its not my finest work. But the kids really liked their shirts, it was easy for me to do and they made for some good conversation starters at the hospital. So, here are the shirts I made for my kiddos!


 My iron-on paper was pretty old and didn't work great...so it looks faded even though it's brand new.


 I also made this for Abi right away too. I saw this photo that was on pinterest and thought it was a great idea. If I had a cricut machine I would've used freezer paper and paint to make these shirts, but since I don't and didn't feel like cutting out the letters by hand I decided to just use iron-on transfer paper.
And one more shot of my fan club and bodyguard!

Continue Reading ...

Saturday, October 6, 2012

freezer paper stenciled shirts, and other random goodies!

We've had a busy week around here...how are the rest of you doing?! Monday we celebrated our oldest daughters sixth birthday! She had an awesome day...Dunkin Donuts for breakfast with dad, school, lunch at Red Lobster with the family (including grammy and papa), presents, cake and a classmates birthday party at Chuck E. Cheese! She had a great day and declared "I'm a grown up now".

Yesterday my husband and I celebrated our 10th wedding anniversary! Can't believe it's been ten years already!! We were able to have lunch at my parents house and then they watched the kiddos so we could go out for dinner and a movie! It's been almost a YEAR since we've been in a theatre! Crazy! We saw "Trouble with the Curve" and I thought it was a pretty good movie! 

No baby yet...but I've been nesting that's for sure. Thursday night I spent a few hours cleaning up the MESS in my bedroom...my craft area. I blogged about the craft area clean up on my blog because I'm joining a couple of others with the great October Overhaul....it's not too late to join if you need a craft area overhaul too!! I can't wait to share my after photos!! My daughter came into my room the next morning and did a double take...and my mom was wondering if she was in the right house when she stepped foot into my bedroom last night! So I guess that means that my cleaning has an impact. It does on me as well because now I know where my supplies are! I have also cleaned things that have probably only been cleaned once or twice since we moved into this house! My house thanks me for nesting ;)

Next Friday my little girl turns 2!! It's a crazy, busy, fun month for all of us here...well, except for Micah, he can't understand why everyone else gets presents and he gets none!

I made an outfit for Naomi's birthday, and I also made shirts for her classmate and Micah's whose birthday party we went to on Monday. Freezer paper stenciling is amazing and I love doing it. The six die on Naomi's shirt was all my husbands idea!! He's pretty creative too ;)

Well, I'm going to go and think baby thoughts and see what we can do to get things moving along!! And it's not too late to enter the giveaway (by guessing baby's birthDAY and other stats) that I posted about last week!!!! I will keep you posted on her arrival!!


Continue Reading ...

Saturday, June 23, 2012

Patriotic T-shirts

My sister-in-law and brother-in-law came down to visit over Memorial Day weekend. We put my handy brother-in-law to work...he wired our surround sound speakers, hung three ceiling fans and a chandelier! Yay for crossing things off the list!

Since it was Memorial Day and my niece and nephew are crafty (like my kids) I figured it would be a fun time to make a little project with all the kids. I had seen this t-shirt idea somewhere but now for the life of me can't remember where it was. I think it may have been Family Fun magazine but I'm not sure. If you know where it came from can you please let me know so I can give the proper credit!!?? Thanks!

These hand-print flag shirts were super easy to make! Just paint their LEFT hand to look like the flag. The bottom right corner is blue and then paint the stripes on the rest of their hand. Then put your kids hand down on the shirt with their fingers facing the right side of the shirt.

The blue paint dried too fast on Naomi's shirt so we made sure to get LOTS of paint on everyone else's hands. The white and red did mix on the few of their hands but that's the beauty of homemade shirts!


Hannah watched all the big kids do their hand prints and then she did a REALLY good job of letting me paint and print her shirt!!


Here they are on Memorial Day with their patriotic shirts! The great thing about these shirts is they can be worn for at least 3 holidays and are just a great shirt to show your support of America!


Um...someone did NOT want their picture taken!
Continue Reading ...

Saturday, June 9, 2012

Father's Day shirt ideas

5 years ago when Micah was merely 3 months old I started a tradition that at the time I didn't know was a tradition. But the tradition continues...and it's something I love to do. I have been creating shirts for the kids to wear on Father's Day, for 5 years! First let's take a trip down memory lane (maybe giving you some ideas) and then I'll show you what I've made for THIS Father's Day! Each shirt is linked to my original blog post so you can see additional photos!


2012 - I've got an AWesome dad

This years Father's Day is all about beer...seems kinda strange since the kids are the ones "giving" the gifts right? Well, I needed a good excuse to get Greg some of the gifts he's getting and didn't want to wait till Christmas! Since I didn't want the kids wearing some sort of "beer" logoed shirt, I decided to go with root beer, and what better root beer than Greg's favorite A&W. I first saw this A&W idea on Nothing But Country's blog and downloaded the printables last year knowing I'd use them at some point.

Here's a tutorial on how I made the shirts!!!
Step 1: I went to the A&W website and downloaded their logo desktop photo to my computer and then got to work personalizing it. I changed the "since" date, added "dad" to the bottom, used the "esome" from the free printables on the original logo and then added "I've got an". I printed out my new logo and got to work.
Step 2: First I taped the logo to my window and then taped my prewashed fabric right over the logo. I traced the logo with my pencil three times (one for each kid)!


Step 3: I ironed some freezer paper onto the back of the fabric so that the fabric would be more stable while I painted and also so that the paint wouldn't bleed through onto other surfaces.


I used paint that was made for fabric. Yes, you can use acrylic paint (and I have in the past) but it cracks much more easily and it becomes pretty hard on the fabric...but in a pinch it will do. These bottles of paint cost $1.50 each at JoAnn's...

BUT, this four pack of fabric paint cost me 97cents! I could hardly believe it when I saw it and bought two different packs! So I ended up buying 8 colors for less than the price of the two colors I really needed! but don't worry, they will get used!

Step 4: I started painting the fabric pieces and painted the color with the least amount of coverage first. I painted the same color on all three shirts at a time.

Step 5: Paint the gold part of the logo. There was no "gold" so I had to mix colors and come up with one. It's not perfect but it'll do. That's the charm of a homemade gift right?
sorry about the lighting here and color distortion!

Step 6: paint the brown. I didn't do two coats on the brown but probably should have. I did do two coats of paint on the other colors. I just made sure to get really good coverage with the brown the first time!

I'm going to try and go back and erase my pencil lines (I hope it works).

Step 7: I carefully cut out the logo right on the outside dark brown area and then removed the freezer paper.

Step 8: Iron on double sided fusible web
I found that if you put the top piece of paper back over what you are ironing you won't have anything stick to your iron and you won't have to cut anything out...the iron will melt  the areas you don't need.
Step 9: Iron the logo onto my brown t-shirts for the kids. If there are little pieces of the fusible web your iron will just melt them away! You may have to clean your iron when you're done but not a big deal!
Step 10: Sew around the edges of the logo to prevent it from falling off! (I still need to do this step!)
Step 11: Put the shirts on the kids and take cute pictures and surprise daddy at church!
The littlest one wanted to put it on right away...so I obliged and took a few photos...but then she didn't want to take it off!

I can't wait for Greg to see the shirts! I think he's gonna love them. And you better believe I'll have photos to share! I would tell you everything that I've got up my sleeve for Greg but on the off chance that he stops by here before Father's Day I better not...just in case!

I will be having the kids fill out one of these questionnaires about dad! And if you need some more ideas, head over to my pinterest Mother's Day and Father's Day board to see what I've pinned. I'll be sure to share photos of what we ended up doing for Greg's gifts in a week or so. I just wanted to get these shirt photos up in case you're still looking for ideas! Have a great weekend and we'll see ya next week!
Continue Reading ...